Suzuki Forums banner
21 - 40 of 148 Posts
cons:
sportsmanship is lost on paved road,
directionality is lost with tires that are too soft (pictured)
This is one time a picture isn't worth a thousand words - what tires are you running?

In my experience, with a properly matched spring/shock combination, the loss of "sportsmanship & directionality" is directly related to tire choice rather than the increase in ride height - admittedly this experience was not with a Vitara LY.

I should mention that I will not buy lift springs from a manufacturer that does not offer shocks/struts to go with them - I also need to know how the lift is obtained, if it's a higher spring rate or a longer spring, higher spring rates needs shocks/struts with different damping to properly control them. It's very easy for a spring manufacturer to say, it's only a 30mm lift, you'll be fine with stock shocks/struts, experience has taught me otherwise.
 
I should mention that I will not buy lift springs from a manufacturer that does not offer shocks/struts to go with them - I also need to know how the lift is obtained, if it's a higher spring rate or a longer spring, higher spring rates needs shocks/struts with different damping to properly control them.
you're right, this was my very doubt
neither Eibach offers dumpers in the catalog for its higher springs.

in 4 years I have tried,
with original, hard and weird suspensions (European market)
the original 17" rims with its Continental, and 16" Mak rims with tires 215/60 R16

with Mad springs and original Suzuki dampers
the roughness of the ground has become lighter
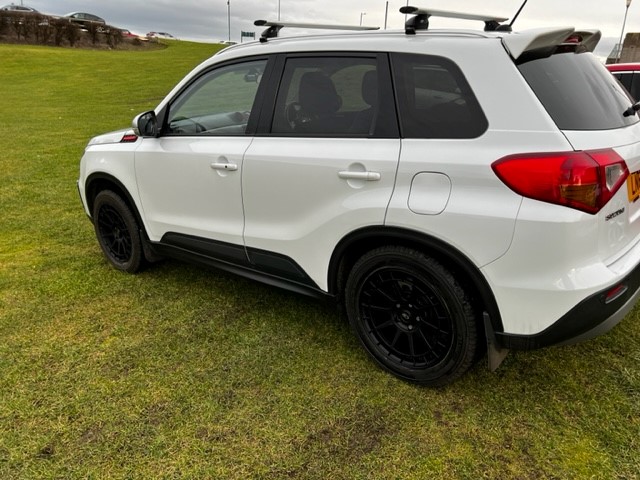
unfortunately with Geolandar G015 tires (pictured) it feels like traveling on a mattress
while with "Dunlop Wintersport5" tires it is almost perfect,
both on asphalt and dirt


.
 
Discussion starter · #23 ·
I was going to sort these wheels in the spring however an opportunity came up in my favourite flavour of rubber..
Michelin Latitude Cross’s in 225/55/17.
Image

For the price I paid, a minimum of 8mm on all tyres it was an amazing purchase…
I also bought the spigot rings to reduce the wheel’s centre bore down from 73 to 60.1mm… makes aligning and centering the wheels easy and safe…
Also some new TPMS valves to prevent bothersome error codes and a disco dash.

Image

Image

Image


My first thought was that the wheels look great….
My second thought is that they’ll be a real PITA to keep clean… so before any road grime / brake dust / salt gets near them, I’m giving them a treatment with Gtechniq C5 Wheel armour… I’ve used this stuff before and it really is a SUPERB product. Takes a while to put on and apply but defo worth the effort.

Apply some to the applicator pad, wipe over the rim , a minute later buff off…… you then leave them to harden up for a day.
Here’s half a wheel completed..
Image


The TPMS’s are apparently pre-coded to Suzuki wheels. I’d been given some reassuring advice previously from @imack who was a great source of first hand info. I’ll feedback later on how the TPMS reacts when used in anger in the spring.
all should be getting put together tomorrow!


Disclaimer - ‘favourite flavour of rubber’ & ’harden up’ are phrases that would normally get you banned or thrown in front of the nearest ‘OP’ in lesser forums….. To keep all the snowflakes (and other forms of frozen liquids happy):

People of a sensitive disposition (Pronoun or otherwise) should stop reading. All events in this thread are fictional. Any resemblance or similarity to people alive or dead is purely coincidental, but probably isn’t.
 
😂😂😂. Love those wheels Martin. Be good to see them on the car. Was going to get some modular steels for winter in 16 inch flavour with some bigger sidewall rubber, but seeing as the car came with a new set of Michelin cross climates, might as well run those through this winter
 
Discussion starter · #25 · (Edited)
When I bought my car it came with a FSH….which it needs to have IMO.
5x services at a Suzuki main dealer, 2x services at independent garages.. Now, You’d naturally think that a ‘SUZUKI’ history would be the preferable option…..don’t be fooled.

I got in touch with the dealership in question and politely asked could they confirm what items had been replaced at the stamped services as no other paperwork was given other than the dealership stamps, it would be handy to know when the plugs were last changed.. had the coolant been replaced etc etc..

The flat answer was NO. due to GDPR rules… utterly ridiculous as I’d asked about my cars details, not the previous owners details…long story short.. they wouldn’t tell me anything, just that if I brought the car in, they’d service it for me for a suitably large price.
Extremely disappointing.

In stark contrast, the two independent garages couldn’t have been more helpful in providing all info requested.. go figure…??!

As it had been at least 3x years since the plugs had been changed and come to think of it.. no guarantee that they’d EVER actually been changed (thanks Suzuki). I set about sorting that issue out.
Now.. you CAN buy the plugs from Suzuki and get a nice dealer invoice for the pleasure… the cost of this is £146 for parts only.

Or

You can buy these yourself from Opie Oils / eBay etc for £56.. these are identical items…
Here’s a quick pic to show the Handbook spark plug spec guide, as well as the two different prices… up to you who you decide to buy from. The NGK number for the 1.4 Boosterjet is: ILZKR7D8

Image


First things first, the main engine cover simply pulls up and away.. no bolts, just push fit retainers...
Next - undo the air cleaner and remove.. you have 2(of) 10mm bolts in (orange) that need undone, an 8mm jubilee clip (green) and an often overlooked breather tube (pink) that pulls off.

Image


The coil packs are held in with 1(of) 10mm bolt. Remove and withdraw each of these…

Image


The plugs are then removed via a 16mm spark plug socket…

Here we are with Old Vs New

Image


The new plugs are installed and tightened to 25nM (18.4lb-ft)… Simply replace the coil packs and air cleaner and tighten up.

Image


4(of) old plugs removed…..all look used of course, but nevertheless they're in pretty good condition and a good indicator of overall engine health. No signs of running lean (looks like a white powder on the electrodes).. or oil fouling.

Finally marvel at your work and re-count the cash that you’ve saved by not using the main dealers. 30mins had all work completed.
 
Discussion starter · #26 ·
😂😂😂. Love those wheels Martin. Be good to see them on the car. Was going to get some modular steels for winter in 16 inch flavour with some bigger sidewall rubber, but seeing as the car came with a new set of Michelin cross climates, might as well run those through this winter
Thats exactly the right thing to do.
I use my standard wheels with full winter tyres during the cold months, the new ROTA wheels above are for summer!
 
Discussion starter · #27 ·
Another frustrating issues I’d been having was while using CARPLAY via the USB port.. no matter which cable I used.. from genuine apple to ungenuine banana… I’d get intermittent connection and drop outs meaning that I’d need to disconnect and reconnect my phone, sometimes 3x in the same song!

on the ’Viva Vitara’ forum, one of the chaps had bought a wireless Interface box.. basically you can use CarPlay with the phone still in your pocket rather than always docked Via cable.. he claimed this worked without issue.
£52 later and this arrived.
Image

Image


straightforward enough…
Forget the Bluetooth to the car… connect the Bluetooth to the device…


Image

Image

Image

it works an absolute treat.

driven around all day, lots of little journeys without a single interruption. 👍🏽
 
I've never used Carplay, but I suspect it's Apple's equivalent to Android Auto - I have a preference to do the route manipulation (searches, etc.) on my phone before moving off and Google Maps & Android Auto does not permit this, I can bypass that restriction by disconnecting the cable and reconnecting it - I've also had one instance in a rental car which had wireless Android Auto, where the in dash navscreen failed, preventing me from setting a new destination because I couldn't disconnect the phone.
 
Discussion starter · #32 ·
A couple of updates....

First up is a safety purchase.... not very glamorous I'm afraid... a space saver safety wheel!!! This magnificent 16" item came from a Mazda 3 and cost the grand sum of £25... It was another £5 to get a small plastic spigot ring to make the centre bore suit the Vitara's smaller size (67mm to 61mm).. A trial fit confirms all is A-Okay.

Otherwise, this will be worth its weight in gold if ever needed.

Image


Image
 
Discussion starter · #33 ·
The next update, the summer wheels are fully assembled!

A trial fit confirms that all fit perfectly, there are no clearance issues and should be fine for installing in the spring.. I've included a couple of photos to illustrate the original vs new items.

Original wheels are 6.5" x 17" with 225 55 17 Nokian full winter tyres
New wheels are 8" x 17" with 225 55 18 Michelin Cross Latiutude's

Here are the original items:

Image


Original Vs New

Image


Image


New Wheels fitted

Image


Image


Image


Image
 

Attachments

Discussion starter · #35 ·
Last day of the year brings a minor repair!
The connection on my USB socket was a bit ‘hit or miss’, more than likely over the 6x years of the cars life.. the small USB tongue part had become worn…
a replacement USB socket was £60 online…
To replace….

Image

You reacharound around the trim panels through the gap down beside the pedals…

Image


in here…

Image


there are two retaining lugs in the socket that are easily pressed in by hand which releases the socket that can then pull through for disconnection and replacement.. all in a 60x second job.

Image


all is now working a-okay!
 
Discussion starter · #36 ·
One thing that I defiantly DO NOT like about my Vitara, is the lack of “heated seats”.. apparently, the continental Vitara‘s have this, no idea why the uk market didn’t go for it.. check out FUSE 36…

Image


To resolve, I purchased a £40 kit from eBay… plus another £5 for the fuse connector and a further £5 for the drill bit for cutting holes for mounting the seat switches…

Image


The heaters I bought have OFF / LOW / HIGH settings.
this video was SUPER helpful in what you need to do…
IFITTING HEATED SEATS

first thing you need to do is remove your seats, disconnect the 2(of) connectors under the seat for the airbag and seatbelt alarm..
Image


the seat is then held in with 4(of) 8mm bolts. These have been thread locked in so they take a bit of force to remove.. slide the seat fully forwards and fully rear wards to access each…

Image


once the seat is out, remove the plastic surround that is on the seat adjuster side, the side I mean is where you adjust the tilt etc…

Image


once removed, you can start to pull the seat cover away from where it’s clipped….

You’ll soon see the small metal circlips that the video shows… cut these off using strong snips… remove the broken pieces of the circling.. you’ll replace these by cable ties… (you’ll need small cable ties BTW)…
Image

Image
 
Discussion starter · #37 · (Edited)
Once you have enough access… start to look to see where the heater element will go…
when you locate the pad, you need to cut a section out for re-attaching the cover retaining strips… hopefully the video and these photos help illustrate…

Image

Image

Image


start by removing the sticky tape and press down, be careful not to wrinkle the pad otherwise it’ll bug you forever!

the cable and thermostat should be far enough back into the seat so you don’t feel them when you sit on it…
now stat reassembling using the canle ties and keeping the cuts on the ties neat..

Leave the side off of the seat just now (plastic controller side)..
the back cover you unveil from the back and pull through to the front… I trimmed the heat mat shorter so that it just reached the trim that’s fixed into the seat.. basically you’re only heating the bottom half of the rear backrest.

This bit as I forgot to take photos!
Image


like the bottom part, reattach using cable ties.
repeat for the other front seat…

you now need to decide where to cut the hole for the switches.. I picked this part here just behind the handbrake…
Go easy and constantly check you haven’t drilled the hole too big…
I used a metal coat hanger to fish the cable down to the relay that sits beneath the seat…
Image


Image

you then connect up the relays to a small jumper fuse holder , I used the handy earth bolt that’s at the side of the fuse box…. Make sure you use some thread lock when you reinstall the seats!
Image


the seats work brilliantly…. Like soooooo good.
well worth the 4hrs work to install them.
Image
 

Attachments

Discussion starter · #38 ·
Some feedback on the heated seat performance. They work BRILLIANTLY.
The ‘high’ setting heats up in minutes…. I then need to switch to the ‘low’ setting as it’s too warm.
Best thing I’ve done to the car so far was fitting these 👍🏽
 
Discussion starter · #39 ·
as the weekend was quiet, I decided to fit my new wheels and see how they worked out with driving / steering / warnings for TPMS etc....

The good
Wheels fitted no problem and look great.. the TPMS sensors also worked without any issue... started the car after the wheel change and not even a flicker on the dashboard.. after a couple of days driving the new sensors remain 100% working. a great result!

TPMS sensors link

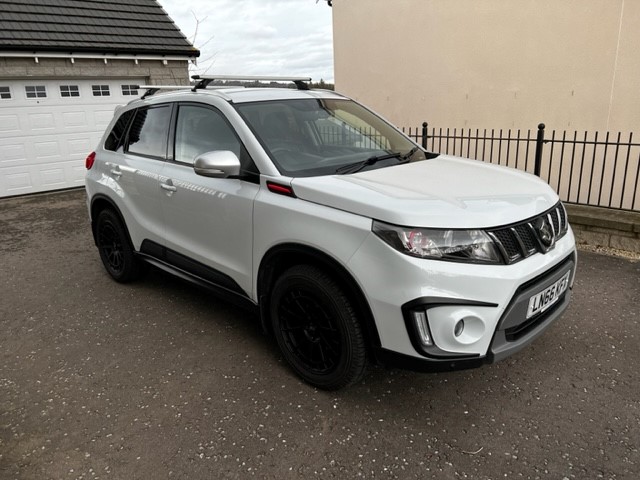
Vitara on ROTA REECE 17x8 Wheels10
Vitara on ROTA REECE 17x8 Wheels12
Vitara on ROTA REECE 17x8 Wheels11


The not so good


The original suzuki locking wheel bolts don't fit the bolt holes on the wheel.. by the time you get your wheel brace onto the bolt key , it won't turn as its physically too large!! you need a narrower locking bolt to fit properly... I've ordered a new set and will update this week with the info when (in) they work..
 
Discussion starter · #40 ·
with some nicer weather, a little maintenance... the brake discs were pretty worn with a pronounced 'lip' on the outside...

nothing else for it but to order some replacement discs and pads. I think it was £75 all in.....

one of the difficult aspects were the small screws that retain the discs in position were seized... I drilled out the screw heads then used mole grips to remove the threaded sections that remained...
I've ordered replacements online that should be here this week.

all in, a good and worthwhile hours' work.

Image


Image


Image
 
21 - 40 of 148 Posts