Afternoon all, quick introduction to myself and my new (to me) 2016 Vitara S
Having owned many different cars and been a member of many MANY forums, best way to kick off is with an ownership thread!!
Evo 8’s 2003 Evo VIII mint... £14,500
![Image]()
Megane 225’s Martin1977 's 'CUP' Adventure
![Image]()
I’d actually previously owned a 2007 Grand Vitara a few years back. An ace little thing that only let go after a spark plug ‘tip’ came off and went through the cylinder! Thanks BOSCH super 4….
One ruined engine later and my £300 purchase / 24K love affair was brought to an abrupt halt… black arm band day indeed….The car had performed BRILLIANTLY.. Going through deep mud / deeper snow / kid school runs without issue. It was indeed a FINE car.
Previous to this Vitara though, I’d owned a Kuga 2.5T in manual, not many of them going around.. The 275BHP was GREAT.. overtaking no problem, Macan baiting.. a pleasure….the rate of unleaded consumption… much less of a pleasure returning on average 26mpg.. that and the £600+ car tax pain made it a fun but wallet emptying 4years…
Kuga 2.5T 2.5T KUGA Adventure
![Image]()
ANYWAYS……. Today brings a new chapter and this little beauty in a charming ‘Essex White’ colour….. nice to drive, frugal… more modern.. it’s a good compromise..
![Image]()
As with all things, it needs some careful adjustment…..
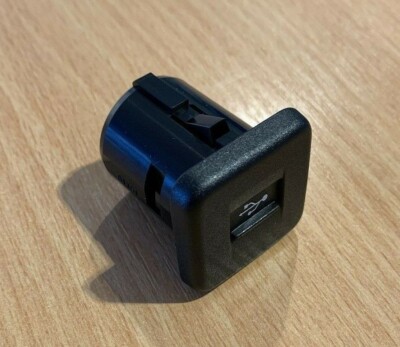
After Exactly 96x minutes of ownership, First up is a software update to enable CAR PLAY.. I’ll also get an updated NAV micro SD from Le Bay…. CarPlay is all fine and well.. sometimes Im out in the wilds (fishing and snowboarding) with no phone signal so it’ll be worth the £20 for when its needed
![Image]()
![Image]()
the info given on the forum by @Ticking_Fox was brilliant to fix.
Next Up, the car is fitted with 4x new tyres… Now. there are tyres and TYRES.. (these are the former).. they’re made of rubber and are worth every one of His Majesty’s £20 Pounds they probably cost to buy… guaranteed to find a ditch every time….
So, they’re going. They’ll be replaced by these Nokian Winter beauties… I’ll get them fitted tomorrow. New (summer) wheels will be fitted in the spring.
![Image]()
![Image]()
After that, the following is planned:
All in the days to come! Thanks for having me along.
Having owned many different cars and been a member of many MANY forums, best way to kick off is with an ownership thread!!
Evo 8’s 2003 Evo VIII mint... £14,500
Megane 225’s Martin1977 's 'CUP' Adventure
I’d actually previously owned a 2007 Grand Vitara a few years back. An ace little thing that only let go after a spark plug ‘tip’ came off and went through the cylinder! Thanks BOSCH super 4….
One ruined engine later and my £300 purchase / 24K love affair was brought to an abrupt halt… black arm band day indeed….The car had performed BRILLIANTLY.. Going through deep mud / deeper snow / kid school runs without issue. It was indeed a FINE car.
Previous to this Vitara though, I’d owned a Kuga 2.5T in manual, not many of them going around.. The 275BHP was GREAT.. overtaking no problem, Macan baiting.. a pleasure….the rate of unleaded consumption… much less of a pleasure returning on average 26mpg.. that and the £600+ car tax pain made it a fun but wallet emptying 4years…
Kuga 2.5T 2.5T KUGA Adventure
ANYWAYS……. Today brings a new chapter and this little beauty in a charming ‘Essex White’ colour….. nice to drive, frugal… more modern.. it’s a good compromise..
As with all things, it needs some careful adjustment…..
After Exactly 96x minutes of ownership, First up is a software update to enable CAR PLAY.. I’ll also get an updated NAV micro SD from Le Bay…. CarPlay is all fine and well.. sometimes Im out in the wilds (fishing and snowboarding) with no phone signal so it’ll be worth the £20 for when its needed
the info given on the forum by @Ticking_Fox was brilliant to fix.
Next Up, the car is fitted with 4x new tyres… Now. there are tyres and TYRES.. (these are the former).. they’re made of rubber and are worth every one of His Majesty’s £20 Pounds they probably cost to buy… guaranteed to find a ditch every time….
So, they’re going. They’ll be replaced by these Nokian Winter beauties… I’ll get them fitted tomorrow. New (summer) wheels will be fitted in the spring.
After that, the following is planned:
- Dashcam hard wired
- LED Number plate lights / Side lights / Interior bulbs
- Mudflaps installed
- Roof rack fitted
- Spare wheel purchased
- Swanky key ring purchased
All in the days to come! Thanks for having me along.