Suzuki Forums banner

2016 Vitara 1.4 S Adventure

2 reading
54K views 147 replies 25 participants last post by  martin1977  
#1 ·
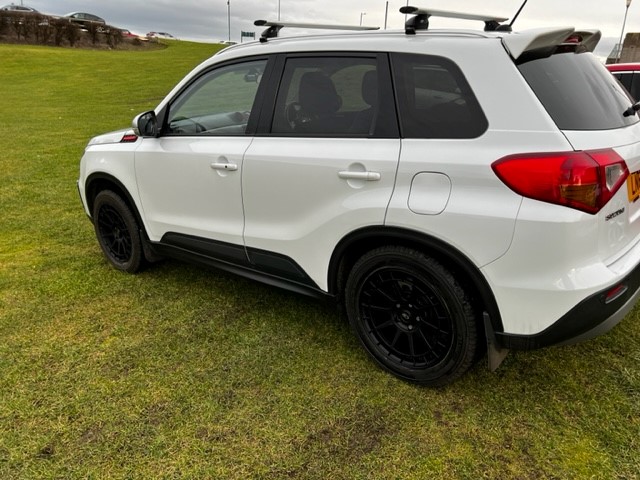
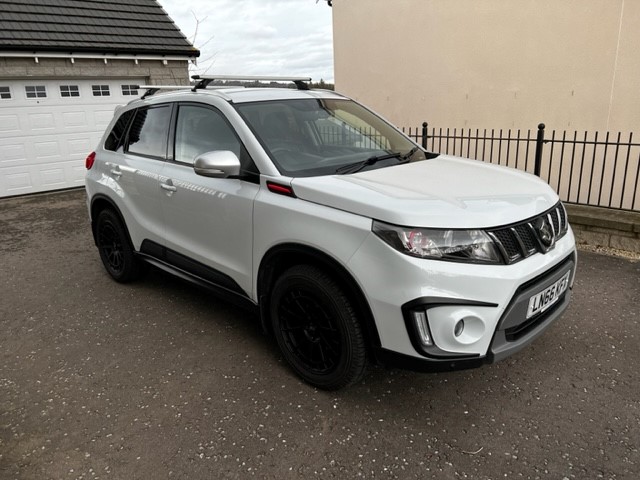
Afternoon all, quick introduction to myself and my new (to me) 2016 Vitara S

Having owned many different cars and been a member of many MANY forums, best way to kick off is with an ownership thread!!

Evo 8’s 2003 Evo VIII mint... £14,500
Image


Megane 225’s Martin1977 's 'CUP' Adventure
Image


I’d actually previously owned a 2007 Grand Vitara a few years back. An ace little thing that only let go after a spark plug ‘tip’ came off and went through the cylinder! Thanks BOSCH super 4….
One ruined engine later and my £300 purchase / 24K love affair was brought to an abrupt halt… black arm band day indeed….The car had performed BRILLIANTLY.. Going through deep mud / deeper snow / kid school runs without issue. It was indeed a FINE car.

Previous to this Vitara though, I’d owned a Kuga 2.5T in manual, not many of them going around.. The 275BHP was GREAT.. overtaking no problem, Macan baiting.. a pleasure….the rate of unleaded consumption… much less of a pleasure returning on average 26mpg.. that and the £600+ car tax pain made it a fun but wallet emptying 4years…
Kuga 2.5T 2.5T KUGA Adventure
Image


ANYWAYS……. Today brings a new chapter and this little beauty in a charming ‘Essex White’ colour….. nice to drive, frugal… more modern.. it’s a good compromise..

Image


As with all things, it needs some careful adjustment…..

After Exactly 96x minutes of ownership, First up is a software update to enable CAR PLAY.. I’ll also get an updated NAV micro SD from Le Bay…. CarPlay is all fine and well.. sometimes Im out in the wilds (fishing and snowboarding) with no phone signal so it’ll be worth the £20 for when its needed
Image

Image


the info given on the forum by @Ticking_Fox was brilliant to fix.

Next Up, the car is fitted with 4x new tyres… Now. there are tyres and TYRES.. (these are the former).. they’re made of rubber and are worth every one of His Majesty’s £20 Pounds they probably cost to buy… guaranteed to find a ditch every time….
So, they’re going. They’ll be replaced by these Nokian Winter beauties… I’ll get them fitted tomorrow. New (summer) wheels will be fitted in the spring.
Image

Image


After that, the following is planned:

  • Dashcam hard wired
  • LED Number plate lights / Side lights / Interior bulbs
  • Mudflaps installed
  • Roof rack fitted
  • Spare wheel purchased
  • Swanky key ring purchased

All in the days to come! Thanks for having me along.
 
#35 ·
Last day of the year brings a minor repair!
The connection on my USB socket was a bit ‘hit or miss’, more than likely over the 6x years of the cars life.. the small USB tongue part had become worn…
a replacement USB socket was £60 online…
To replace….

Image

You reacharound around the trim panels through the gap down beside the pedals…

Image


in here…

Image


there are two retaining lugs in the socket that are easily pressed in by hand which releases the socket that can then pull through for disconnection and replacement.. all in a 60x second job.

Image


all is now working a-okay!
 
#36 ·
One thing that I defiantly DO NOT like about my Vitara, is the lack of “heated seats”.. apparently, the continental Vitara‘s have this, no idea why the uk market didn’t go for it.. check out FUSE 36…

Image


To resolve, I purchased a £40 kit from eBay… plus another £5 for the fuse connector and a further £5 for the drill bit for cutting holes for mounting the seat switches…

Image


The heaters I bought have OFF / LOW / HIGH settings.
this video was SUPER helpful in what you need to do…
IFITTING HEATED SEATS

first thing you need to do is remove your seats, disconnect the 2(of) connectors under the seat for the airbag and seatbelt alarm..
Image


the seat is then held in with 4(of) 8mm bolts. These have been thread locked in so they take a bit of force to remove.. slide the seat fully forwards and fully rear wards to access each…

Image


once the seat is out, remove the plastic surround that is on the seat adjuster side, the side I mean is where you adjust the tilt etc…

Image


once removed, you can start to pull the seat cover away from where it’s clipped….

You’ll soon see the small metal circlips that the video shows… cut these off using strong snips… remove the broken pieces of the circling.. you’ll replace these by cable ties… (you’ll need small cable ties BTW)…
Image

Image
 
#37 · (Edited)
Once you have enough access… start to look to see where the heater element will go…
when you locate the pad, you need to cut a section out for re-attaching the cover retaining strips… hopefully the video and these photos help illustrate…

Image

Image

Image


start by removing the sticky tape and press down, be careful not to wrinkle the pad otherwise it’ll bug you forever!

the cable and thermostat should be far enough back into the seat so you don’t feel them when you sit on it…
now stat reassembling using the canle ties and keeping the cuts on the ties neat..

Leave the side off of the seat just now (plastic controller side)..
the back cover you unveil from the back and pull through to the front… I trimmed the heat mat shorter so that it just reached the trim that’s fixed into the seat.. basically you’re only heating the bottom half of the rear backrest.

This bit as I forgot to take photos!
Image


like the bottom part, reattach using cable ties.
repeat for the other front seat…

you now need to decide where to cut the hole for the switches.. I picked this part here just behind the handbrake…
Go easy and constantly check you haven’t drilled the hole too big…
I used a metal coat hanger to fish the cable down to the relay that sits beneath the seat…
Image


Image

you then connect up the relays to a small jumper fuse holder , I used the handy earth bolt that’s at the side of the fuse box…. Make sure you use some thread lock when you reinstall the seats!
Image


the seats work brilliantly…. Like soooooo good.
well worth the 4hrs work to install them.
Image
 

Attachments

#39 ·
as the weekend was quiet, I decided to fit my new wheels and see how they worked out with driving / steering / warnings for TPMS etc....

The good
Wheels fitted no problem and look great.. the TPMS sensors also worked without any issue... started the car after the wheel change and not even a flicker on the dashboard.. after a couple of days driving the new sensors remain 100% working. a great result!

TPMS sensors link

Vitara on ROTA REECE 17x8 Wheels10
Vitara on ROTA REECE 17x8 Wheels12
Vitara on ROTA REECE 17x8 Wheels11


The not so good


The original suzuki locking wheel bolts don't fit the bolt holes on the wheel.. by the time you get your wheel brace onto the bolt key , it won't turn as its physically too large!! you need a narrower locking bolt to fit properly... I've ordered a new set and will update this week with the info when (in) they work..
 
#40 ·
with some nicer weather, a little maintenance... the brake discs were pretty worn with a pronounced 'lip' on the outside...

nothing else for it but to order some replacement discs and pads. I think it was £75 all in.....

one of the difficult aspects were the small screws that retain the discs in position were seized... I drilled out the screw heads then used mole grips to remove the threaded sections that remained...
I've ordered replacements online that should be here this week.

all in, a good and worthwhile hours' work.

Image


Image


Image
 
#42 ·
As I'll be going down the 'debadged' look route, today was the day for removing the chrome badges on the rear..... I'd toyed with the idea of having my existing badges painted (plastidip) however decided against this..... As a middle ground, I ordered up a set of vinyl badges to try out..... a bit of heat with a hairdryer to soften the glue... removal via some dental floss.... a wipe over with white spirit and its an easy task....
 

Attachments

#44 ·
Snow for the North East of Scotland today... -5oC and around 6" of the white stuff.... I should have waited and kept my winter tyres on!! The Michelin Latitude Cross Climates managed just fine mind you.

I also managed to tow out 2x cars stuck on my way to work!
View attachment 110360

View attachment 110359
What a shame they didn't know what was towing them out now you took all the badges off the back. I like rubbing it into the Subaru people that I tow out
 
  • Like
Reactions: martin1977
#52 ·
Had a set of Eibach +25mm springs delivered during the week, ordered a set of Bilstein B6’s to complement the upgrade…
The rears fitted easily enough, I did have the use an angle grinder to reduce the size of my spring compressors to get access though… it’s a 17mm socket down below, a 15mm spanner up top (you need mole grips to pinch the top of the strut to stop it rotating when you undo the top nut).
The front springs are too… despite being ordered at the same time, the front Bilsteins are due for delivery end June..
I need to decide if I simply wait, or make the spring change now, knowing that I’ll need to do it again in 3x months time…
Will get some other pics when it stops raining…


Image

Image

Image

Image
 
#54 ·
That square on the top of the shaft is what you use to stop it rotating. Never use a socket to undo a strut as you can't see when the nut is about to come off. Even with a spring compressor its never a good idea to let the strut fall free and possibly dislodge the compressor. Seen the results, not nice.
 
#55 ·
That’s the front Eibach springs now fitted… car drives a lot nicer than previously. It’s well worthwhile changing out the drop links while you have everything disassembled… I had to cut one of mines off so makes sense to have replacements to hand..

Image

Image


also the first time it’s been properly cleaned since I bought it 6x months ago!


Image
 
#57 ·
no worries!
the boot mat was this item.
Tailored Boot tray liner car mat Heavy Duty for SUZUKI VITARA mk2 2015-up | eBay

as for the LEDs, the interior lights, number plate lights and front side lights make a great improvement. The main beam lights also make a nice upgrade and match the normal (dipped) lights perfectly.
if you want real long distance lighting, you’d need to look down the route of installing a quality light bar.
 
#59 ·
I agree, my driving lights go way further than a light bar ever will. Can't beat a well designed reflector and lens combination with a nice 100W halogen at the focal point. Yes, they are old, yes they are heavy, but if you want to melt tarmac at 200 metres, they are great.
 
#60 · (Edited)
After Exactly 96x minutes of ownership, First up is a software update to enable CAR PLAY.. I’ll also get an updated NAV micro SD from Le Bay…. CarPlay is all fine and well.. sometimes Im out in the wilds (fishing and snowboarding) with no phone signal so it’ll be worth the £20 for when its needed

View attachment 108234
I just came across your thread and started reading and saw this! I tried using Android Auto on my brand new 2023 Vitara 4G with the same infotainment system and was disappointed it was not working. I did not know I had to enable it. May you please guide me on how to do this?

Great looking ride by the way! 😃
 
#62 ·
Been a little while since I’ve updated this thread, so the newest thing to have happened is that I treated the underside of the car with Lanogurad, a type of sealant that I’ve read positive feedback on.. they sell it in both black and clear.
it smells really strongly so use an old cover to catch drips…. Wear old clothes and also wear a hat.
it sprays on really easily and hardens after about 5x days…
Ill do the front suspension and wishbones etc when I’m under there sorting the front Bilstein dampers.. if they ever arrive!!
Image

Image

Image


I checked this today having applied last weekend and it has indeed done a smashing job of coating the underside.
Well worth the £28
 
#64 ·
Hiya Martin

so if I’m reading this thread correctly, you are currently running the eibach lift springs with standard shocks ?? How are you finding it ….. any negatives to report ?

chris
Hi Chris, I’m running the eibach springs on standard front shocks as I’m still awaiting the delivery of the Bilstein B6’s (8x months now), on the rear I have the eibach springs and the Bilstein.
nothing negative to report whatsoever.
 
#67 ·
the sun is out today and the temperature gauge is rocking a balmy 6oC… a fine time to get the winter wheels out and fitted.
although the Michelin Cross Lattitude’s are a fine all season tyre… I still prefer the full winter rubber in the white stuff… Nokias WR G4’s in this case.

its an easy case of 4x wheels off.. 4x back on again. I also switch the rears to Fronts and vice versa. As the Nokian‘s are directional, I can’t switch the tyre side of the car.

Image

Image

Image


The Rota wheels look immense compared to the standard Suzuki items,..really turns a great looking setup back to semi-standard!
 
#68 · (Edited)
righto, some new Bilstein shocks to go with the Eibach 25mm lift kit….
first up is to remove the drop link nut… these can be a PIG … mines are only 8x months old and as such, we’re copper greased when I fitted them.. there are quite a few nuts on this job that need an Allen key to stop the centers spinning so pay attention!

Image


next up you have the brake line bolt and the small ABS wire to remove. You’re then faced with 2x 17mm bolts that hold the suspension to the lower assembly:


Image


Image


Pop the cap off the strut top and undo this nut, note you need an Allen key here to stop it rotating..
once this nut is undone, the strut will fall down! It catches in the lower arm which then allows you to remove it…

Image


the hardest bit (read most risky) is compressing the springs… place each spring clamp either side of the spring and tighten them right up… the coils should be almost touching… you need to be very , VERY careful here as there’s a LOT of trapped energy in that spring. Keep fingers out of coils!!

Image


undo the top nut on the strut, again using an Allen key, and remove all the parts and arrange the various parts in the order you’ll reassemble them..
I always start right to left…..
Image


remove all spring seats from the old shock and reassemble all components on your shiny new shock..
I always put a bit of grease on the spring seats (top and bottom) to aid these settling into place..


Image


reassemble all parts in the reverse order as above… make sure your spring is located in the lower cup hard up againat the bit that catches the spring end.. it’s obvious when you see it.
 

Attachments

#73 ·
Great story about your Vitara.
I've seen from your pictures that after mounting und lift springs your rear axle is perfectly horizontal.
How about the front? Are the cv axles also horizontal, just like the rears?

Can you post partnumbers of those springs and shocks?
The photos (beneath the car) aren’t showing how the driveshafts sit… the car is of course jacked up!!
All part numbers are attached below…

Image

Image
 

Attachments